Starting home espresso can feel overwhelming. Machine types, grinder burrs, tamping pressure, extraction ratios - it's a rabbit hole. But here's the reality: you can make genuinely excellent espresso at home with a ~$400 total setup, and you don't need to understand all the variables to get great results from day one.
This guide cuts through the noise. We'll walk you through exactly what you need - machine, grinder, and essential accessories - at three budget levels: entry ($200–$399), mid-range (~$620), and serious (~$700+). Pick the tier that fits your budget and commitment level, and you'll have everything you need to get started.
What You Actually Need (And What You Don't)
✅ You Need: A Pump Espresso Machine
Only a pump-driven machine (9+ bars) produces real espresso. Avoid "steam espresso" machines - they use steam pressure (3-4 bars) and produce very strong coffee, not espresso. Look for "pump espresso machine" or "15-bar pump" in the product description.
✅ You Need: A Burr Grinder
Espresso's biggest variable is grind consistency. A blade grinder will undermine even the best machine. A burr grinder - even a budget one - is essential. This is where most beginners underinvest and wonder why their espresso tastes off.
✅ You Need: A Kitchen Scale
A $15 kitchen scale is one of the best investments in your espresso setup. Weighing your dose (grounds going in) and yield (espresso coming out) is how you dial in consistently. Without a scale, you're guessing every time.
✅ You Need: A Tamper
Most entry-level machines come with a plastic tamper - it works but isn't ideal. A proper 58mm metal tamper ($20–40) gives you more consistent pressure. Your portafilter basket diameter determines your tamper size (usually 51mm or 58mm).
❌ You Don't Need: A Milk Frother (at first)
If your machine has a steam wand, that's your frother. A separate electric frother is unnecessary unless you specifically don't want to learn steam wand technique.
❌ You Don't Need: Expensive Beans (at first)
Start with a reliable mid-range espresso blend ($15–20/bag) while you dial in your equipment. Save the $30 single-origin specialty beans for when your technique is consistent - otherwise you'll waste expensive coffee on bad shots.
The Three Setup Tiers
🥉 Entry Setup: ~$400 Total
Best for: First-timers, those unsure if home espresso is for them, tight budgets

Machine: De'Longhi Stilosa EC260BK - $149
Real pump espresso, manual steam wand, compact design. The best entry-level machine that's actually capable of good espresso.
Check it out →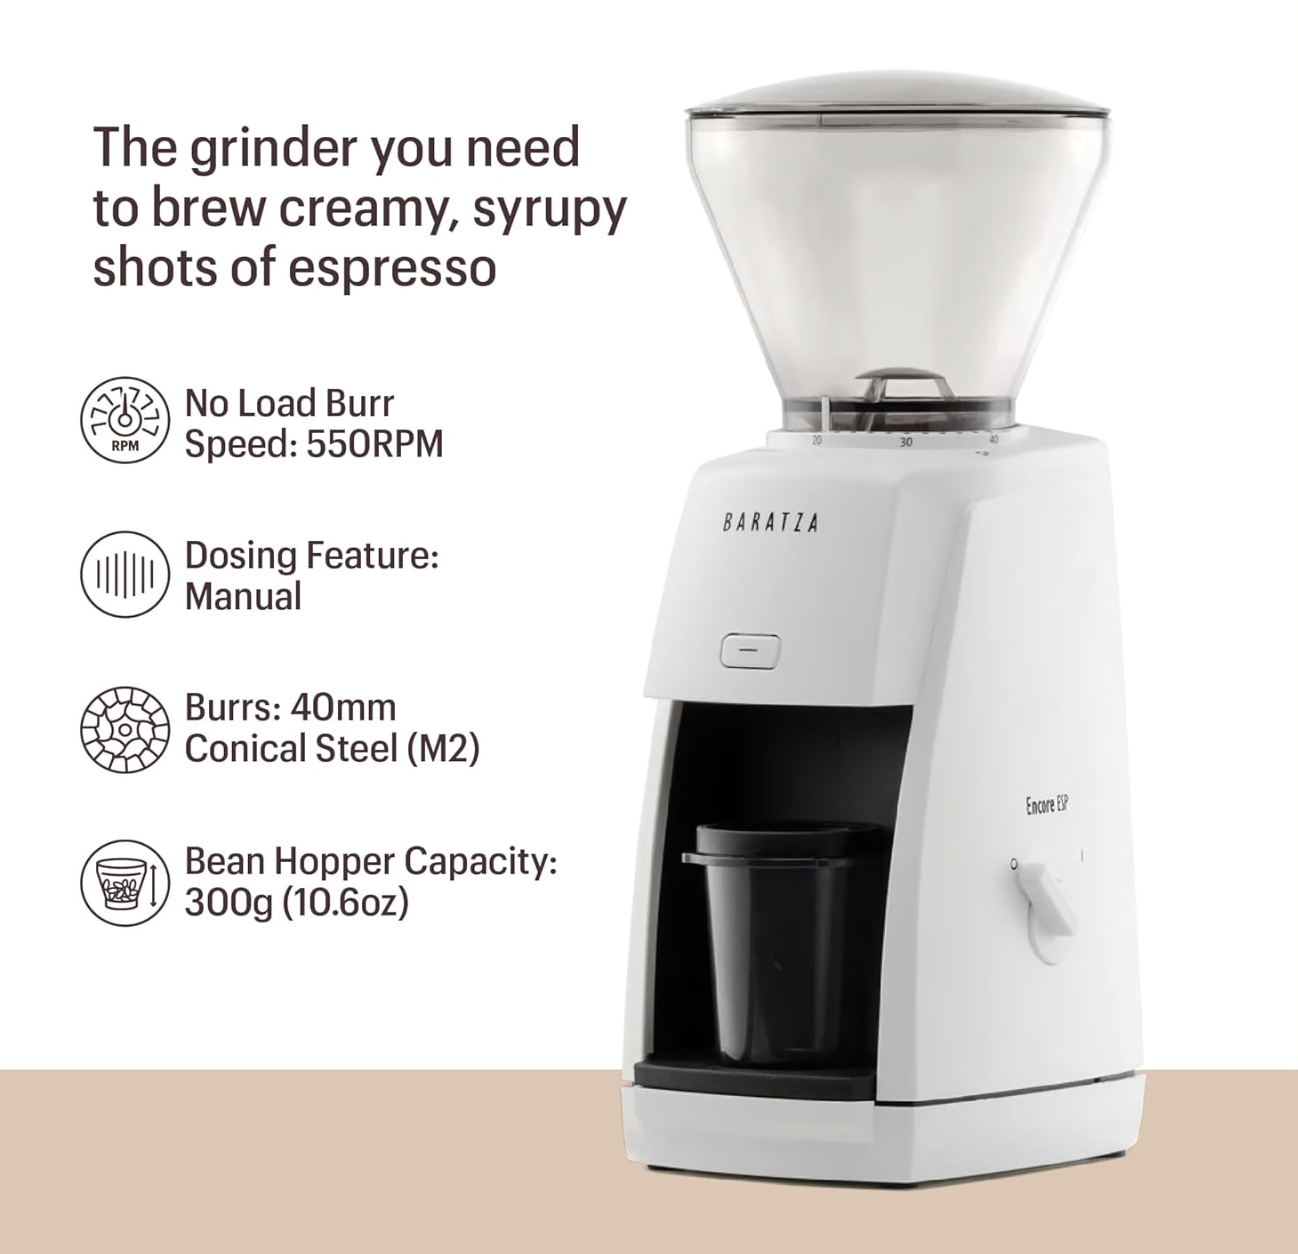
Grinder: Baratza Encore ESP - $199
Purpose-built espresso grinder with 40 settings and micro-adjustment. The most recommended beginner espresso grinder.
Check it out →Accessories Needed
- Kitchen scale ($15) - for weighing dose and yield
- Metal tamper ($20) - for consistent tamping pressure
- Espresso glasses or cups ($15) - pre-warm them for better shots
What to Expect
This setup will produce genuinely good espresso. You'll have a learning curve of 1-2 weeks dialing in your grind size and tamping technique, but once there, you'll be pulling shots better than most coffee shops. The Stilosa's steam wand handles lattes and cappuccinos well. Total cost of ~~$400 saves itself vs. a $6/day coffee shop habit in about 45 days.
🥈 Mid-Range Setup: ~$620 Total
Best for: Those committed to home espresso who want fewer frustrations and more features
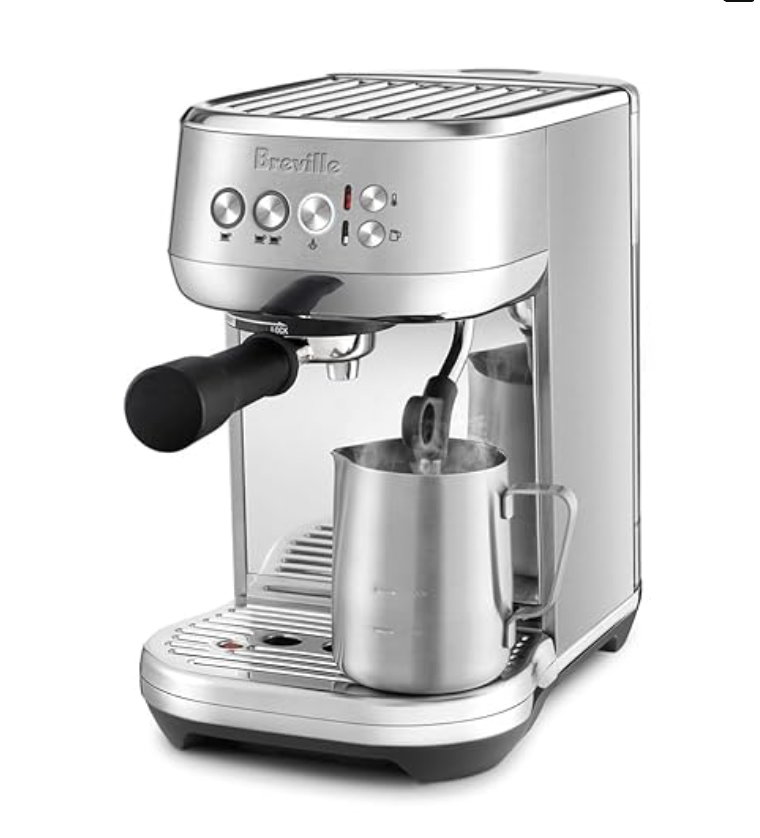
Machine: Breville Bambino Plus (BES500BSS) - $399
The Bambino Plus is a significant step up: 3-second heat-up time, automatic steam wand (sets milk temperature automatically), and a professional 54mm portafilter. This is the machine that converts beginners into home barista enthusiasts.
Check it out →
Grinder: Breville Smart Grinder Pro (BCG820BSS) - $200
60 grind settings, programmable dose-by-time, and designed to pair perfectly with Breville machines. Covers espresso through French press so it grows with your brewing interests.
Check it out →Accessories Needed
- 54mm tamper ($25) - matches the Bambino Plus portafilter
- Kitchen scale ($20) - precision matters more at this level
- Milk jug / pitcher ($15) - for latte art practice with the auto steam wand
What to Expect
This is the setup that gets people obsessed with home espresso. The Breville Bambino Plus is remarkably forgiving - its thermojet heater is always at temperature, the auto steam wand handles milk perfectly, and the build quality feels professional. Paired with the Smart Grinder Pro, you have a complete, capable setup with room to grow. Most users at this tier never feel the need to upgrade further.
🥇 Serious Setup: ~$700 Total
Best for: Those who want a near-commercial setup at home, latte art practitioners, coffee enthusiasts
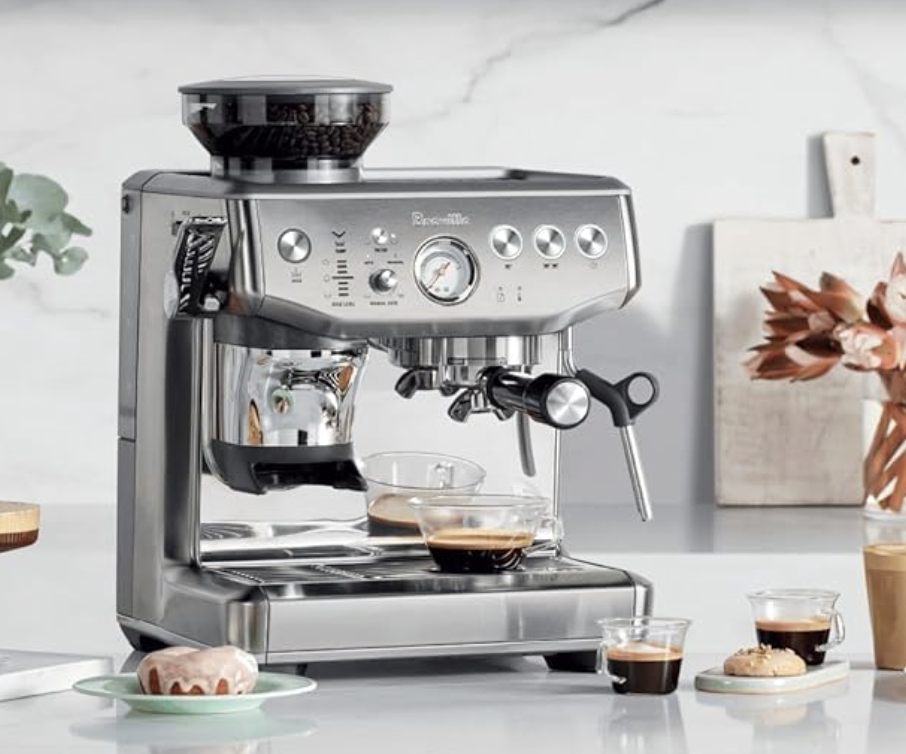
Machine: Breville Barista Express Impress (BES876BSS) - $649
An all-in-one machine with a built-in conical burr grinder, Assisted Tamping system (ensures correct tamping pressure automatically), and dual boiler for simultaneous espresso and steam. This is the machine that serious home baristas save up for.
Check it out →Grinder: Built-in (comes with the machine)
The Barista Express Impress includes a conical burr grinder - the big advantage of this machine is you don't need a separate grinder. One purchase covers everything.
Accessories Worth Adding
- Precision portafilter basket upgrade ($30) - improves extraction consistency
- Quality milk pitcher ($20) - for latte art
- WDT distribution tool ($15) - eliminates channeling from clumps
- Espresso scale ($35) - the Barista Express has a built-in scale but an independent one improves feedback
What to Expect
The Barista Express Impress delivers a near-commercial experience at home. The integrated grinder, assisted tamping, and dual boiler remove most of the variables that frustrate home baristas. Expect genuinely excellent, consistent espresso and properly textured milk from the first week. At this tier, the limiting factor shifts entirely to your technique and beans - the equipment won't hold you back.
Essential Espresso Accessories (For Any Setup)
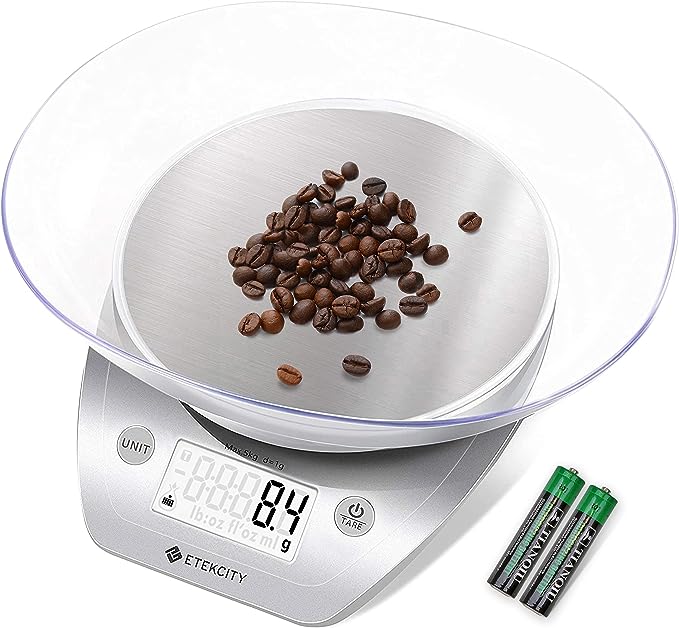
⚖️ Kitchen Scale - $15–35
Weigh your dose (grounds in) and yield (espresso out) for every shot. A 1:2 ratio - 18g in, 36g out - in 25-30 seconds is your target. Without a scale you're guessing; with one you're dialing in. Any kitchen scale with 0.1g precision works. A dedicated espresso scale with a built-in timer is a nice upgrade for ~$35.
Check it out →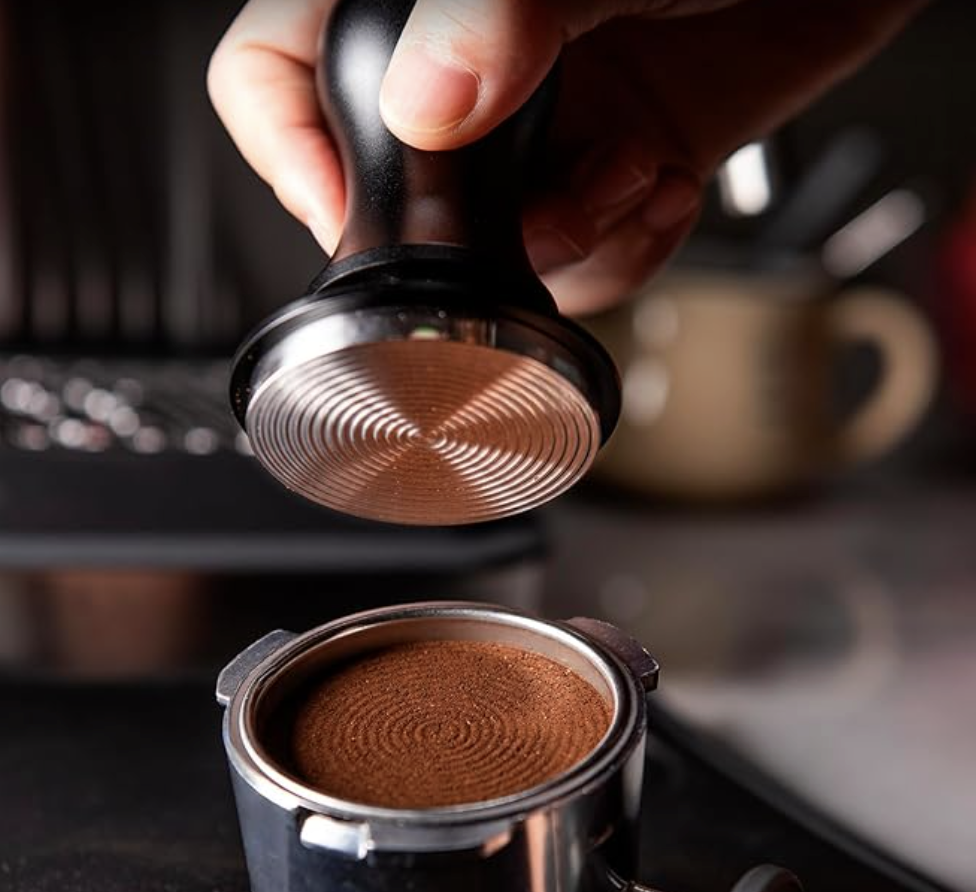
🔧 Tamper - $20–50
A properly fitting tamper (51mm or 58mm depending on your machine) applies consistent 30 lbs of pressure to level your puck. The cheap plastic tampers included with entry-level machines work but a solid metal tamper makes tamping more intuitive and consistent. Sized correctly for your portafilter basket.
Check it out →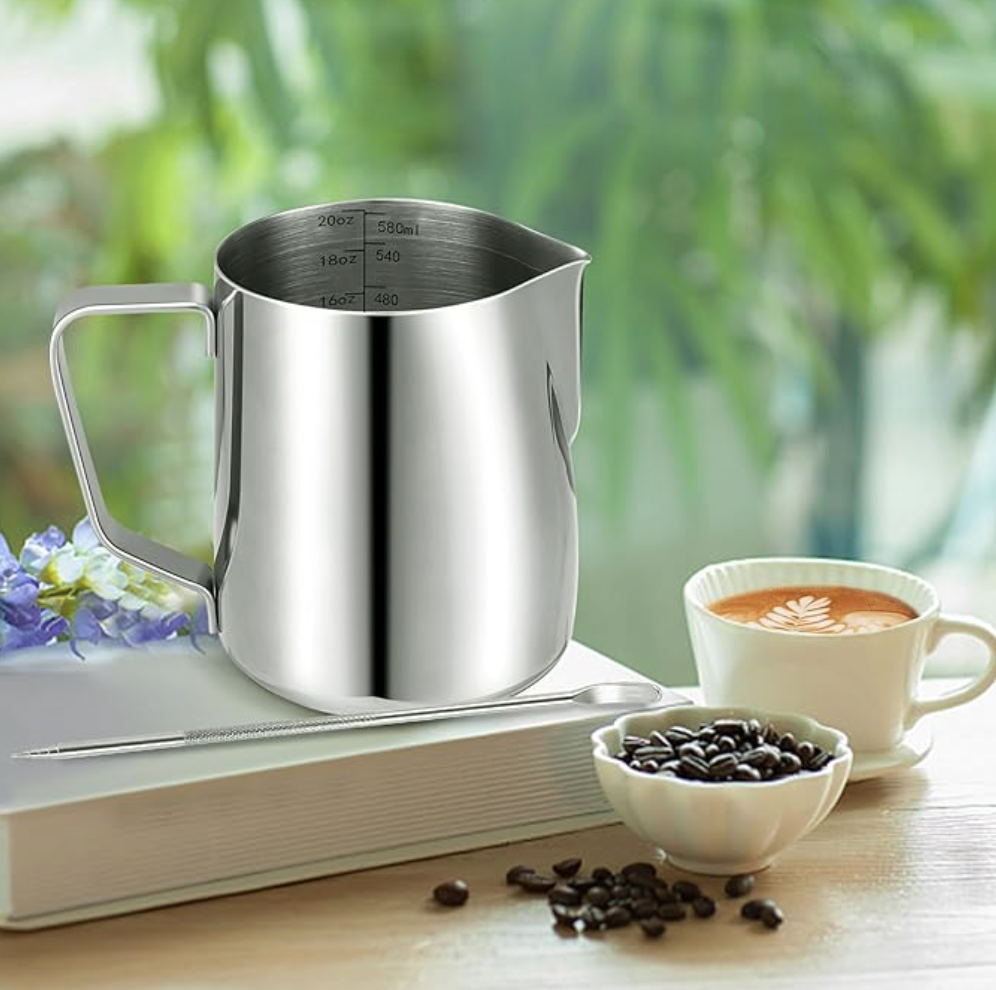
🥛 Milk Pitcher - $15–25
A 12oz stainless steel milk pitcher is the right size for a single latte or cappuccino. Cold milk expands significantly when steamed - don't fill it more than halfway before steaming. A pitcher with a pointed spout helps with latte art when you're ready to practice.
Check it out →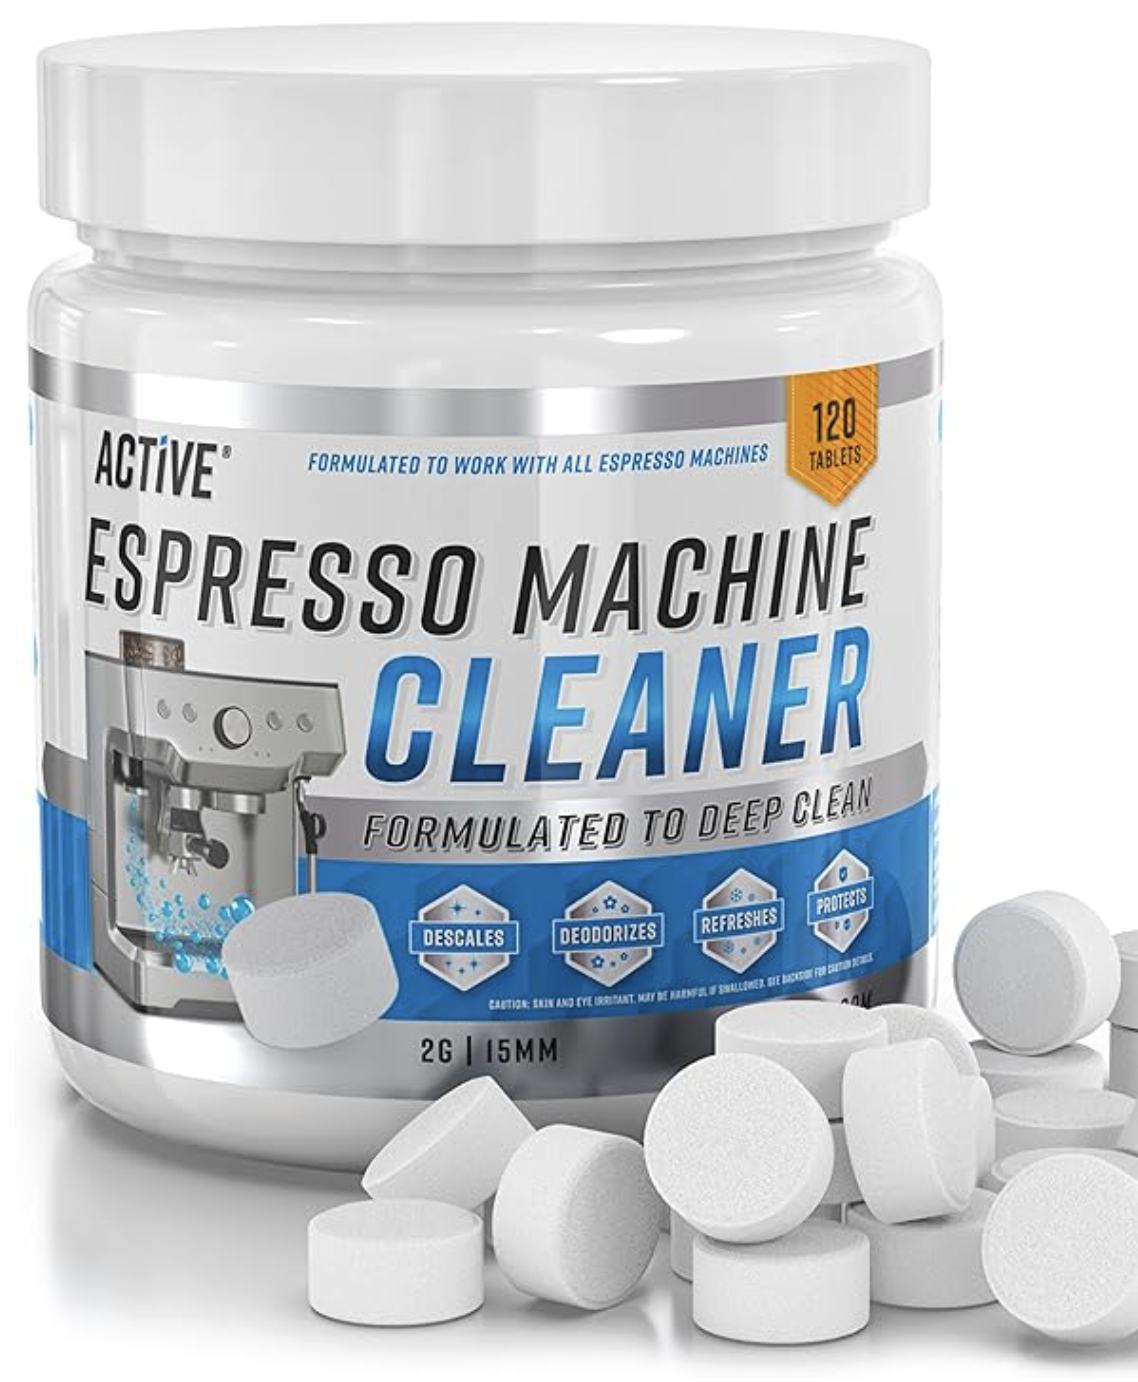
🧹 Cleaning Tablets - $10–15
Espresso machine cleaning tablets (like Urnex Cafiza) and descaling solution are essential for machine longevity. Run a cleaning cycle monthly and descale every 2-3 months. Neglecting this is the #1 reason espresso machines underperform or break prematurely.
Check it out →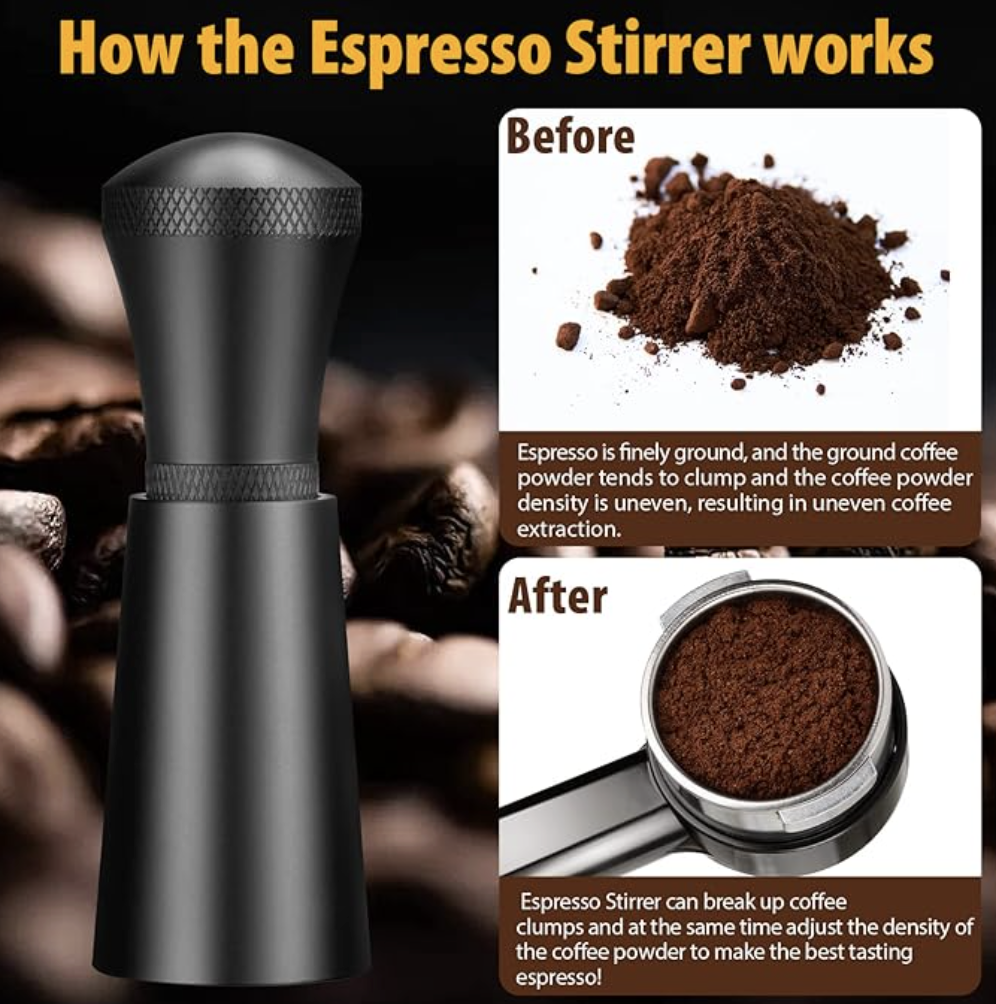
🪡 WDT Tool - $10–20
A WDT (Weiss Distribution Technique) tool - essentially a set of thin needles in a handle - stirs your grounds in the portafilter basket to break up clumps before tamping. It costs almost nothing and dramatically reduces channeling. A recommended add-on once you've got your basic setup dialed in.
Check it out →Frequently Asked Questions
How long does it take to learn to make good espresso?
Most beginners pull consistently good shots within 1-3 weeks of daily practice. The first few days involve dialing in your grind size for your specific beans - this is the biggest learning curve. Once you've found your grind setting, each subsequent shot is mostly about consistency in your workflow (dose, distribution, tamp).
Milk texturing for lattes takes a bit longer - expect 2-4 weeks to get smooth, creamy microfoam consistently. Latte art is a skill on its own that takes months to develop, but good-tasting lattes come quickly.
Is home espresso actually cheaper than going to a coffee shop?
Yes, significantly - once your setup is paid off. Here's the math on the entry setup (~$400 total):
- Coffee shop latte: $6/day × 365 = $2,190/year
- Home espresso: ~$1/day in beans and electricity = $365/year
- Setup cost: ~$400 paid off in ~45 days of saved lattes
- Year 1 savings: ~$1,550. Year 2+ savings: ~$1,825/year
The mid-range setup (~$620) pays off in about 3 months. Even the $649 all-in-one machine pays for itself within 6 months if you were buying daily lattes.
What's the difference between espresso and regular coffee?
Espresso is brewed by forcing hot water through finely ground coffee at high pressure (9 bars). This produces a concentrated, 1-2oz shot with a layer of crema (the golden foam on top). Regular drip coffee uses gravity and much less pressure, producing a larger, less concentrated drink.
Espresso is the base for most coffee shop drinks: add steamed milk for a latte, add equal parts milk foam for a cappuccino, add hot water for an Americano, or drink it straight as a shot.
Can I use any coffee beans for espresso?
Technically yes - any coffee can be brewed as espresso. In practice, medium to dark roast beans work best. They're more soluble (extract more easily), produce thicker crema, and have the bold, rich flavor profile most people associate with espresso. Light roasts can make excellent espresso but are harder to dial in and taste quite different (more acidic, fruity).
For beginners: start with beans labeled "espresso blend" or "espresso roast." Once you're comfortable with your setup, experiment with single-origin and lighter roasts.
Do I need filtered water for espresso?
Strongly recommended. Hard water (high mineral content) builds up scale inside your machine's boiler and pipes, reducing performance and eventually causing damage. If you have hard tap water, using filtered or softened water will extend your machine's life significantly and improve flavor.
You don't need to buy bottled water - a basic Brita filter pitcher works well. Avoid distilled water (zero minerals), which can actually damage some machine components; you want low-mineral, not zero-mineral water.
Should I buy a machine with a built-in grinder?
The Breville Barista Express series includes a built-in grinder - a convenient all-in-one approach that saves counter space and simplifies setup. The trade-off: you can't upgrade the grinder independently as your skills improve.
Separate machine + grinder setups (like the Stilosa + Baratza or Bambino Plus + Smart Grinder Pro) give you more flexibility and often better grind quality per dollar. For most beginners, the all-in-one Barista Express is an excellent choice - it simplifies the setup while still delivering quality shots.
Choose Your Starting Point
There's no universally "right" setup - only the right setup for your budget and commitment level. If you're not sure home espresso is for you, start with the entry tier (~$400). If you're already committed and want to skip the frustrations of truly entry-level gear, the mid-range Breville Bambino Plus setup (~$620) is where most people land and stay.
Whatever tier you choose, the most important move is starting. Home espresso has a learning curve, but the reward - pulling a perfect shot on your own machine, in your own kitchen - makes the first few weeks of dialing in completely worth it.